
Hello and welcome dear (future) members of the LeadIn sphere!
We are delighted that you have joined our community of enthusiasts of lead generation who always strive to grow and keep up with the latest business trends.
Now that we’re together, let us take a moment and walk you through building your first campaign with LeadIn .
You may have questions, but trust us, nothing is as complicated as it looks.
When you don’t know where to start …
Choose LinkedIn .
All kidding aside, in this article we are going to create a campaign based on the LinkedIn search tool traditional to make the campaign creation process easier for you.
However, you should be aware that when it comes to LeadIn, options are much wider . In addition to a classic LinkedIn search, you can target prospects from Sales Navigator or Premium , a file imported in CSV format, a post in the LinkedIn news feed (post engagement campaign), or even from a saved prospect list in Sales Navigator.
That being said, let’s open LinkedIn and target our audience.
Start by typing a keyword in the search box.
We have chosen a job title.
After clicking on “ People , Choose the type of LinkedIn connection you want your campaign to address.
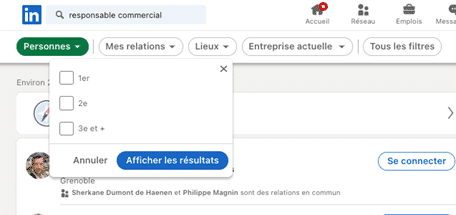
Connections 1st degree are members with whom you are already connected on LinkedIn. They are perfect for running a LinkedIn messaging campaign.
Connections to 2nd degree are best in case you want expand your network . These are prospects with whom LinkedIn wants you to exchange a connection or whom you need to contact by InMail (if they are open to InMails) or by E-mail first (if LeadIn finds out and checks it).
The same goes for connections to the third degree . They are also used to expand your network . The only difference is that it is not advisable to contact them through LinkedIn connection requests when you have a basic account, but exclusively through e-mails and / or InMails (free or paid).
You can choose other filters in order to restrict your audience research (see the “All filters” option on the right).
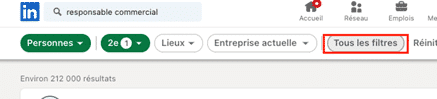
Keep in mind that you can include up to 1000 prospects in LeadIn via a LinkedIn search-based campaign, so it is highly recommended to collapse the list as much as possible.
After selecting and choosing your audience, open your LeadIn account .
Click on “ Create New Campaign “.

Copy – Paste URL LinkedIn search on the LeadIn campaign creation page.


As you can see in the image above, insert the name of your campaign and paste the LinkedIn search URL.
Under the LinkedIn URL, there is a button type connection . LeadIn automatically recognizes from the pasted URL the degree of connection that you are targeting.
Click on “ following “.
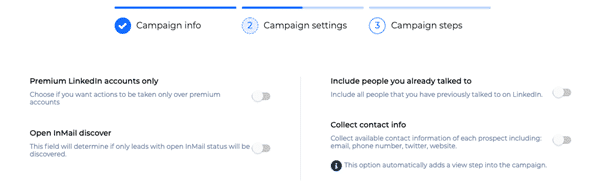
In activating / deactivating the above options, LeadIn will automatically:
In the advanced options, pre-activated by default , LeadIn goes:
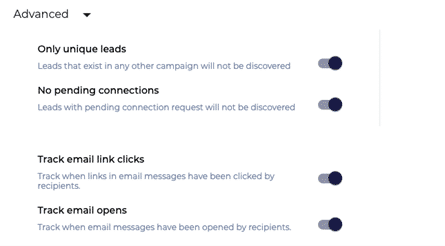
Only unique leads – include / exclude all leads that exist in any other LeadIn campaign;
No pending connections – do not choose leads who already have a pending LinkedIn connection;
Track clicks on links – check if the lead clicked on the link in the email (if your email contains any);
Email openings tracking – check if the prospect has opened an email.
LeadIn lets you choose the start date, start time, and your time zone.
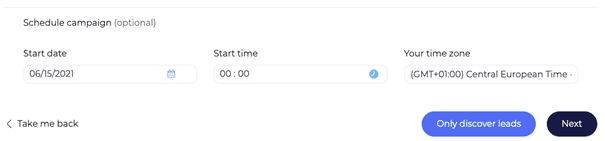
NOTE : Take into consideration which account you are running – yours or your client’s, which may be in a different time zone.
If you click on “ Only Discover Leads », LeadIn will only export the discovered leads to a CSV file.
Click on “ Next “And choose” Smart Sequence “.

This is what your dashboard will look like at the start.
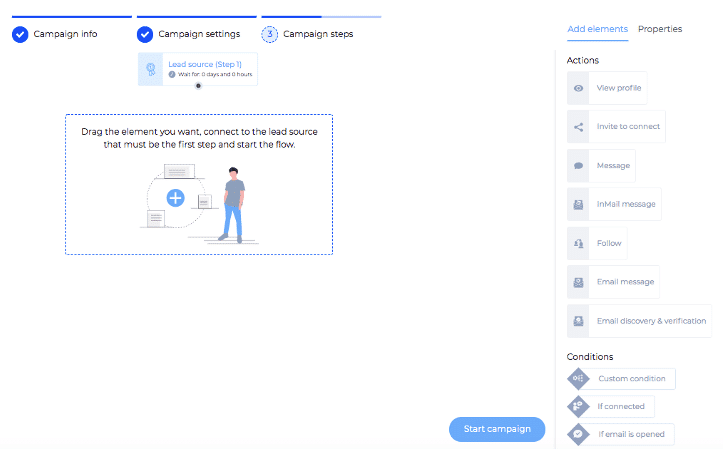
As you can see, on your right are some elements and conditions .
Drag them one by one to the dashboard of the workspace and connect them consistently to create your scenario !
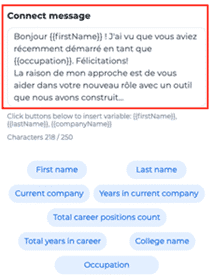
Know that for each customizable element , you have the option to insert the message, use all the variables you need, get the most out of the function hyper-personalization of images and GIFs , and define after how many days and / or hours you want a certain element or some condition be executed. All of this in one place!
As complicated as it sounds, it’s actually very intuitive!
Find our tips on prospecting on LinkedIn .
The multichannel prospecting being currently the most efficient way to generate leads , Smart Sequences are revolutionary, allowing you to create different scenarios for your workflows depending on the prospect’s behavior.
This is the step “ if / then (condition) Which makes the difference.
To explain it in the simplest way possible, look at the type of sequence other tools use to generate leads.
For example, a (very simple) flow goes like this:
If all goes according to plan, no problem. However, if the prospect doesn’t accept your connection request, you won’t go further.
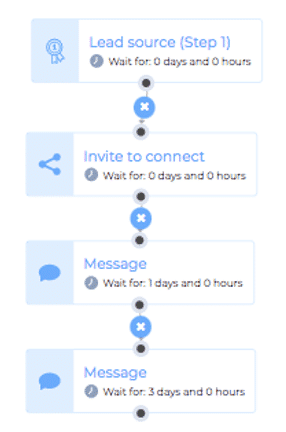
With smart sequences, the same flow can be presented as follows:
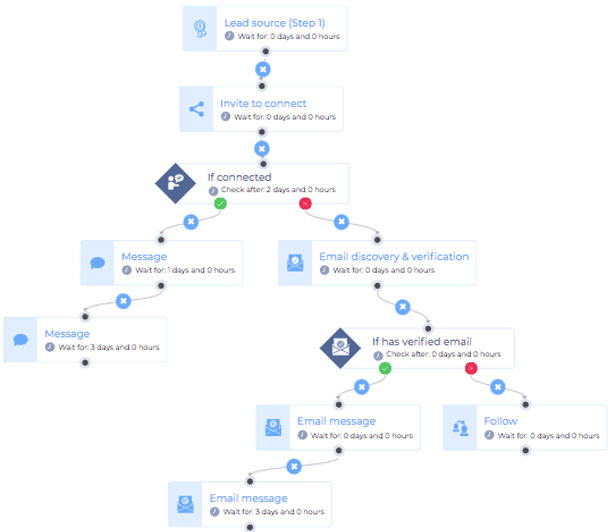
As you can see, your smart sequence just won’t stop. It will follow other available / possible paths to your prospect bypassing completely LinkedIn if necessary .
NOTE : Do not forget to add a delay to the step “ IF Connected “, Otherwise LeadIn will immediately go to the” NOT »(I advise you at least 2-3 days to give your prospect time to accept you in his network).
We hope to have demystified a little the entire process of creating a campaign on LeadIn ! Creating a campaign is a lot easier than you might think, right? 😎
Next step, get started with LeadIn! Click this link to take advantage of a 14-day free trial .
If you are not yet a user and would like more information, schedule a demo call with a specialist from our team. Chat about how you can get the most out of our tool!
If you are already a customer, do not hesitate to contact us on the support chat …
See you soon ! 👋